Showing posts with label party themes. Show all posts

Monday, October 3, 2011

1st Birthday Ho-Down


Please ignore our classic error of looking into 2 different cameras. ;)
This weekend we celebrated our son's 1st year. From reading you may know this is kind of a big deal for us, since our son only has half a heart and has already had 2 open heart surgeries during his little life. 
So needless to say this milestone has been on our radar for some time. We celebrated with a fabulous harvest festival that was just as much fun for the adults as it was the kids! 
I wanted to share a few of my projects with you that made this party extra special. 
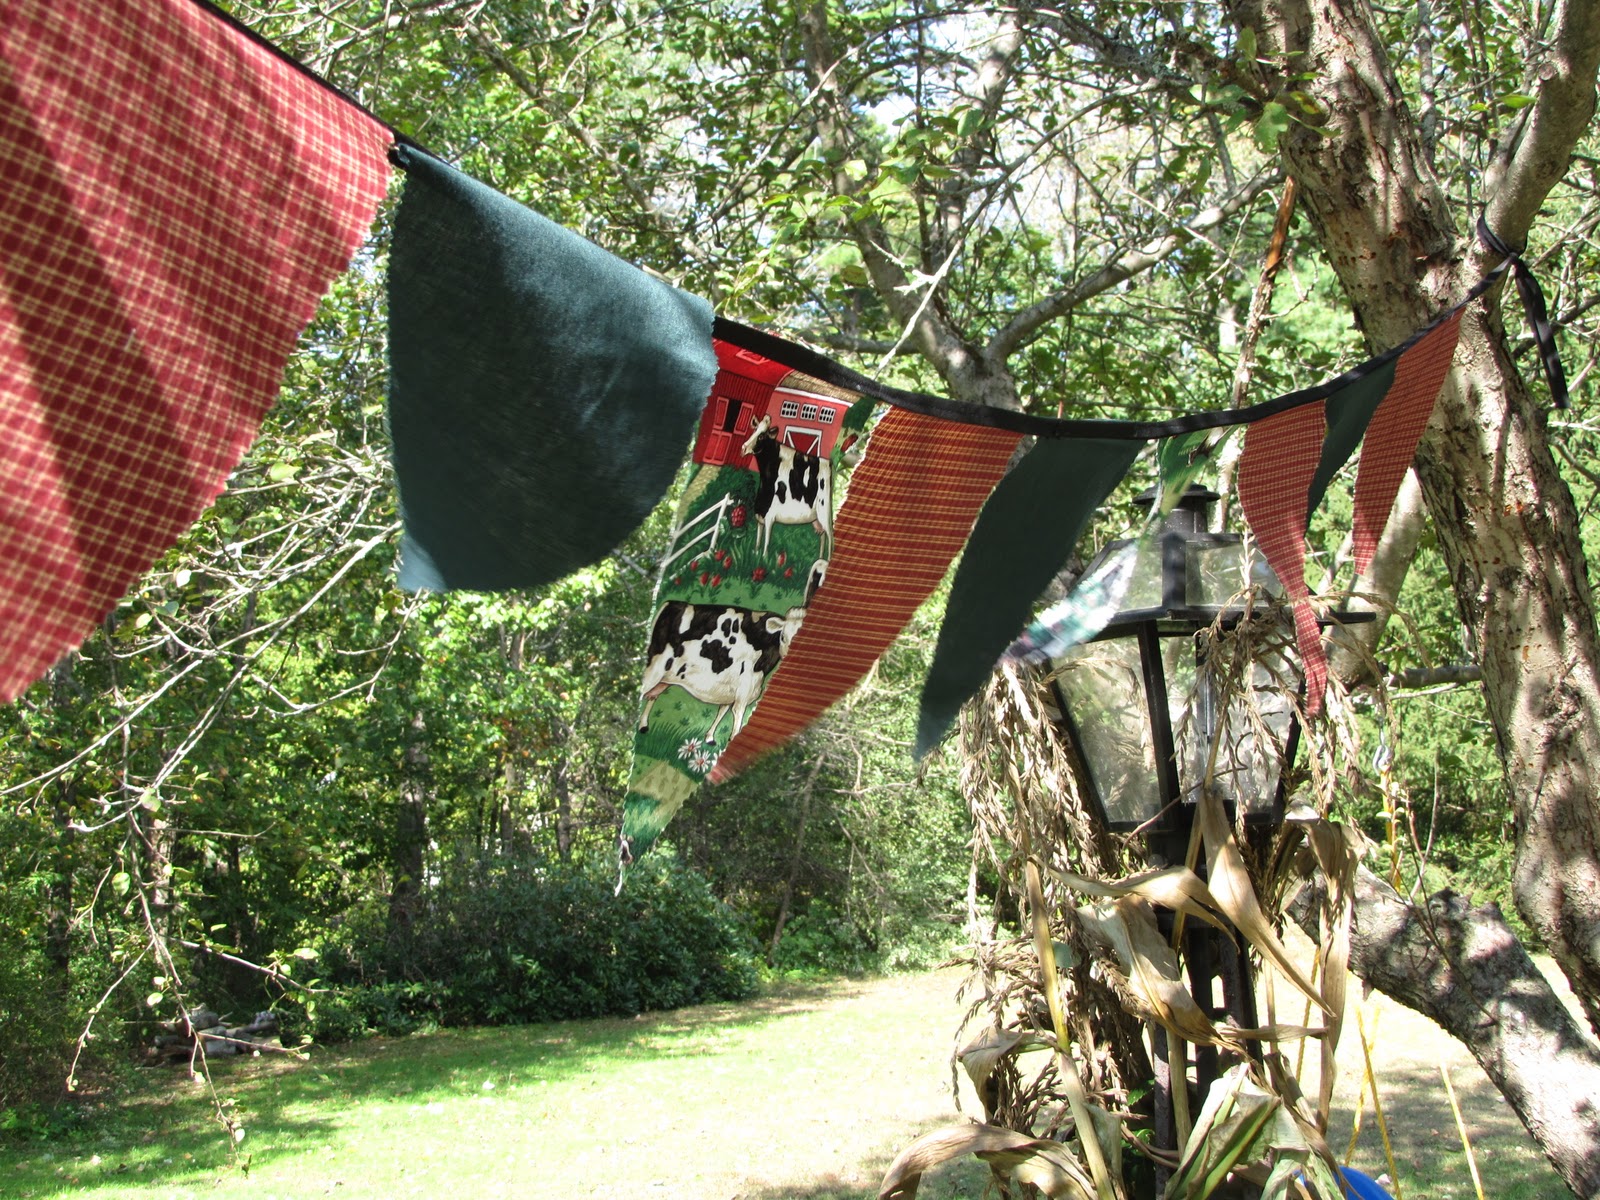
The first was a simple DIY bunting made with fabric scraps and left over double bias tape from my new curtains. Tutorial posted here.
I think they served their purpose beautifully. Since I used leftover materials this free project saved money I would have spent on balloons or crepe paper. 


My next project was party favors. 


I had found the idea for pies in jar online and thought this would be perfect. After much debate of what to do for filling, I ended up making chocolate. This allowed me to pre-cook the pies so they only needed be refrigerated and EATEN! 
 They came out beautifully and were DELICIOUS. My husband actually found out I have two extra crusts left and is insisting I make 8 more pies ASAP. 
I also purchased adorable custom labels on etsy that I glued onto the tops with craft glue. Detailed tutorial here.

For the kiddos I made chocolate lollipops of frogs, ladybugs, and butterflies. I never realized how easy these are. You make them in the microwave. Also, I didn't feel guilty about giving parents a bunch of junky toys or a bag of candy they would have to ration out all week.

For interior decorations I printed out our favorite pictures of Lucas from the past year. Then I glued them to scrap booking paper and hung them from rope clotheslines around the kitchen with mini clothespins.


Activities: 
We had 2 games and 2 big activities. The first was hay rides on our lawn tractor. The kids loved this! Especially the birthday boy!


 Even a few adults jumped in at the end. 

Then I set up a photo station in front of our shed.

We had lots of hats, fake teeth, mustaches, noses, etc. to choose from and took family photos of everyone in attendance. I made the mustaches out of felt, poster board, craft glue, and wooden kabob sticks.


While everyone was waiting their turn I made Penny Pitch game with Poster board. I printed out some fun pictures of cows, pigs, barns, apple trees, and a cloud and glued them to the poster board. Then I picked up some giant pennies at the dollar store and a huge role of stickers. All the kids loved this game. They got a sticker if their penny landed on one of the items on the board. The older kids stood further back and some of the littlest ones just had fun putting stickers on the board!


The other game was a simple donkey printed out and laminated with a roll of artist tape on the back. This was stuck onto the backs of unsuspecting guests. When they noticed they would in turn have to put it on someone else's back. Even though we made up the game the donkey spent most of the party on my husbands back or my own. Everyone got a kick out it. It was also a nice conversation starter: ' Why is there a donkey on your back?'

Food: 
I TRIED to make a tractor cake. I bought the pan and all the accessories, but in the end it was 2pm and guests were arriving as I stood with frosting in hand not even sure how to put to put the piping bag together! Luckily my Sister-in-law stepped in and saved the day and finished the job for me. It came out adorably.


Most importantly Lucas loved it.


Also, my dear friend came baring the most beautiful delicious looking gift of all. She made vegetable themed cupcakes that she had slaved over for the past days. But, the cupcakes were never eaten.... you can read more about this tragedy on her vegan cooking blog


  We all had a wonderful day! Can't wait 'til next year!

Don't make your guests cook! -> Pie in a Jar


So if you are a pinterest and facebook addict like I am you may have seen 'Cake in a Jar.' This concept of making single serving cakes in mason jars made me so excited I talked about it for probably a month straight. When I started to plan for Lucas' birthday party it was a no-brainer that I was going to make them. But then I saw these. The most beautiful creations ever... PIES in a Jar . This was ABSOLUTELY perfect for my Harvest themed birthday party! The concept is to make individual pies in mason jars. The pies are uncooked. You freeze them and then when you want to eat it you bake it for 45-50 minutes and then eat it!
As the party drew closer. I continued to run down the logistics with friends and family as I obsessed over these magical creations. Note that I think she makes FOUR pies in her tutorial and I was planning to make TWENTY FOUR. We later found this is the equivalent of making 6 pies. Flashes of my grandmother bringing seven pies to Thanksgiving one year went before my eyes.
We still talk about it.
Why?
Because that's A LOT OF PIES!
And my apple peeler corer leaves a lot to be desired. It basically works well if every apple is the EXACT same size and shape. But sorry, God don't make 'em that way. My grandmother recommended cherry pies. This made me sulk around the house for a day, because cherries aren't fall fruit and thus do NOT go with my wonderful Harvest theme. I felt like my masterful plan, my hopes and dreams for pies in jars were all falling to pieces before my eyes. Ahh, logistics.
Then it came to me, PUMPKIN pies! I was all excited that I could use my handy Foley mill that I use for making my son's purees or if I lost ambition at the last minute I would just buy canned pumpkin pie filling! Easy Peasy!
Now I don't know the last time I ate pumpkin pie (I don't even like pumpkin pie) and I have never made one in my life. Actually I've never made a pie before. I do make a mean crisp. My mom said I had to wait and make them the day before the party. She was worried about freezing them and thawing them just for our guests to freeze them again. The day before the party my mother-in-law mentioned what uncooked pumpkin pie filling looked like. She said its really runny and kindof gross. AWESOME. So we will give runny uncooked ugly pies to people.
After much discussion, chocolate came into the conversation. Precooked crust was mentioned. All you need is chocolate pudding for the filling was brought up. We were down to the wire and I was SOLD. Note: We did TRY making crusts to see how many we would need to fill a jar. There was flour everywhere and it was a disaster. Again we realized we would at least need enough for 6 pies. So the next day I packed up my one year old on his birthday and we bought out Market Basket of every last box of chocolate pudding and grabbed all the pre-made pie crusts they had. Here's how to make these bad boys.


Roll out 1 pie crust-  (or in my case- unroll my prepackaged crust)
Cut it into quarters with a sharp knife
Use one quarter per jar. Push the center of you quarter to the bottom and push it tight against the glass.
Push the extra onto the sides. Overlap as necessary. Smoosh with your fingers until it feels evenish and completely layers the inside of the glass. Make sure that your edge comes as close to the top of the glass as possible. You can add extra dough if you need to. I used one and half extra pie crusts just for filling in gaps and adding edging to the top
I used a fork along the top rim to make an edge. Then take your fork and poke holes in your crust on the bottom and sides.
Now you really need pie weights or else they do sink down quite a bit in the jars. I used empty baby food jars.They worked perfectly. I used the pie crust directions cooking at 350 degrees for 11 minutes.
 
You can see in the photo my first batch in the upper left. I didn't build them high enough and didn't use the weights. I also took them out a little early
Now mix up your pudding as they cool. You can simply follow the directions on the jello box. Once the pudding thickens and your crusts are cooled it's time to add them together!

I let them cool together for about another hour before I sealed them shut and put them in the fridge. I bought labels from this fabulous etsy dealer .

A bunch of party goers forgot their pies when they left so we were left with 6 pies in our fridge. After trying one, my husband and I devoured the remaining 4 in the next 12 hours. They were delicious! And all my guest had to do was EAT them! Or put them in the fridge until they had a lovely chocolate craving.

Note: I used 1/2 pint wide mouth jars. The brand I used was Kerr and we picked them up at Ace Hardware.

No Muss No Fuss Bunting


 I am a perfectionist. It's just how I roll. Now when I proposed making bunting and the materials I would use, my mother quickly reminded me about ten times that it doesn't need to be perfect. 

She recalled making our costumes for our Reformation plays in grade school (what? Your school didn't perform REFORMATION plays!) Yes. We literally performed Reformation plays. It was a private Christian School with 80 kids in it. What can I say. Every year it was a different one. So every year we needed new costumes. I will never forget the year my sister was Queen Elizabeth. My mother toiled over that hideous green curtain fabric for days and weeks.In the end it was a hideous green dress that was done soo beautifully Queen Elizabeth could have worn it herself (if she was the size of an 8th grader.) My mother brought it into school and another mom reminded her- 'It's a play... There are bright lights and no one will even see the back.' That's when my mom learned the value of sewing for decoration or play. Don't fuss. Don't spend hours stitching perfect seams on a play costume. Then they will be scared to wear it. JUST LET GO.

Making bunting (for decoration) is about just that. My triangles are not perfect. My cut lines from the pinking shears are not even. Even my well laid plan to have all my farm animals right side up fell through. My stitches are not straight, but I made four strings of bunting from soup to nuts in about one hour with no pins. And they look great because they are about effect- NOT becoming an heirloom or their re-sale value. No muss, no fuss.

This isn't going to be formal instructions, but should be enough info to get a person with some experience sewing through. If you run into problems, feel free to let me know.

So first take a piece of 8 1/2x11" paper and fold it in half lengthwise. Cut diagonally from one corner to the other. Unfold. 
Vuala- Pattern!
Now fold up your fabrics into a nice long rectangle that is tall enough for your pattern and wide enough for a few triangles. 
If your fabric is too thick you may have to guage how many times you fold it so your scissors can still cut through. 
I didn't even draw the pattern on the fabric. I just started cutting along the edge of the paper.  
Just be careful not to cut your paper since it will dull the shears. 
Only cut the diagonals. 
You will use regular fabric scissors for the bottom of the triangle when you finish cutting them out so you have a straight edge to sew to.  
When you finish cutting both diagonals flip your triangle on the fabric so it matches the diagonal you just cut. Now you only have to cut one side! 
Then flip and cut again until you get to the end of your rectangle. 
Do this with as many colors of fabric that you want.
To make things easy for myself I then put them in a stack in the order I wanted to sew them. I tried to not make an exact repetitive pattern, but also tried to not have the same fabric twice.
I then placed my double bias tape along the bottom edge of the triangle on top of my fabric (which should be facing up).Then start sewing. Remember to lock the beginning and the end so your stitches don't unravel. When you get close to the end of the first triangle slide your next triangle into place under the bias tape and just keep going . Leave room on both ends to tie off the bunting. You don't have to use bias tape. You could use ribbon or apron cord or anything you have that won't fray.


That does it! Now hang up your bunting and enjoy your party decorations that were hopefully next to nothing to make!
Related Posts with Thumbnails