Showing posts with label holidays. Show all posts

Wednesday, February 15, 2012

Braided Infinity


For Christmas I also wanted to make a "younger" looking scarf for my two sister-in-laws.
I came across a braided scarf tutorial on pinterest and got to work. Unfortunately the tutorial had me literally pulling my hair out, so I thought I would post my own tutorial that addresses some of the issues and allows for a more polished result.

Again, I wanted to make two scarves from the same fabric so I simply cut it in half width wise. This left me with four 11"x 36" strips.
The pink scarf above was made from some leftover spandexy, velvety fabric I had lying around. I fudged around an just made a width and length I felt comfortable with. You can also use two medium sized t-shirts.
The green scarf below was made from standard cotton fabric from JoAnns.

Braided Infinity Scarf Tutorial
Take two pieces of fabric and sew them (right sides together) to make a tube. I used 1/4" seams. Leave about a two inches untouched on either end.

Do this again using the other two pieces of fabric.

Turn both tubes right side out.

Take a random strip of fabric and tie the ends of the two tubes together. Now you will have two circles.

You are now ready for your knot.
The knot was VERY confusing to figure out. I actually got my husband's help and practiced on two pieces of string.
Hopefully, I can describe it clearly.


Knotting the Scarf


Put the knotted end of circle A through the unknotted end of circle B
Then take the knotted end of circle A and pull it up on top of the unknotted end of circle A.
Now take the knotted end of circle B and put that through the center of everything (where the arrow is)
Now pull each knotted end.

It should end up looking like this:


Closing the Scarf 
 I left side openings on each tube like below:
 please ignore the tulle inside the tubes, I tried it for extra volume, but it didn't look good.

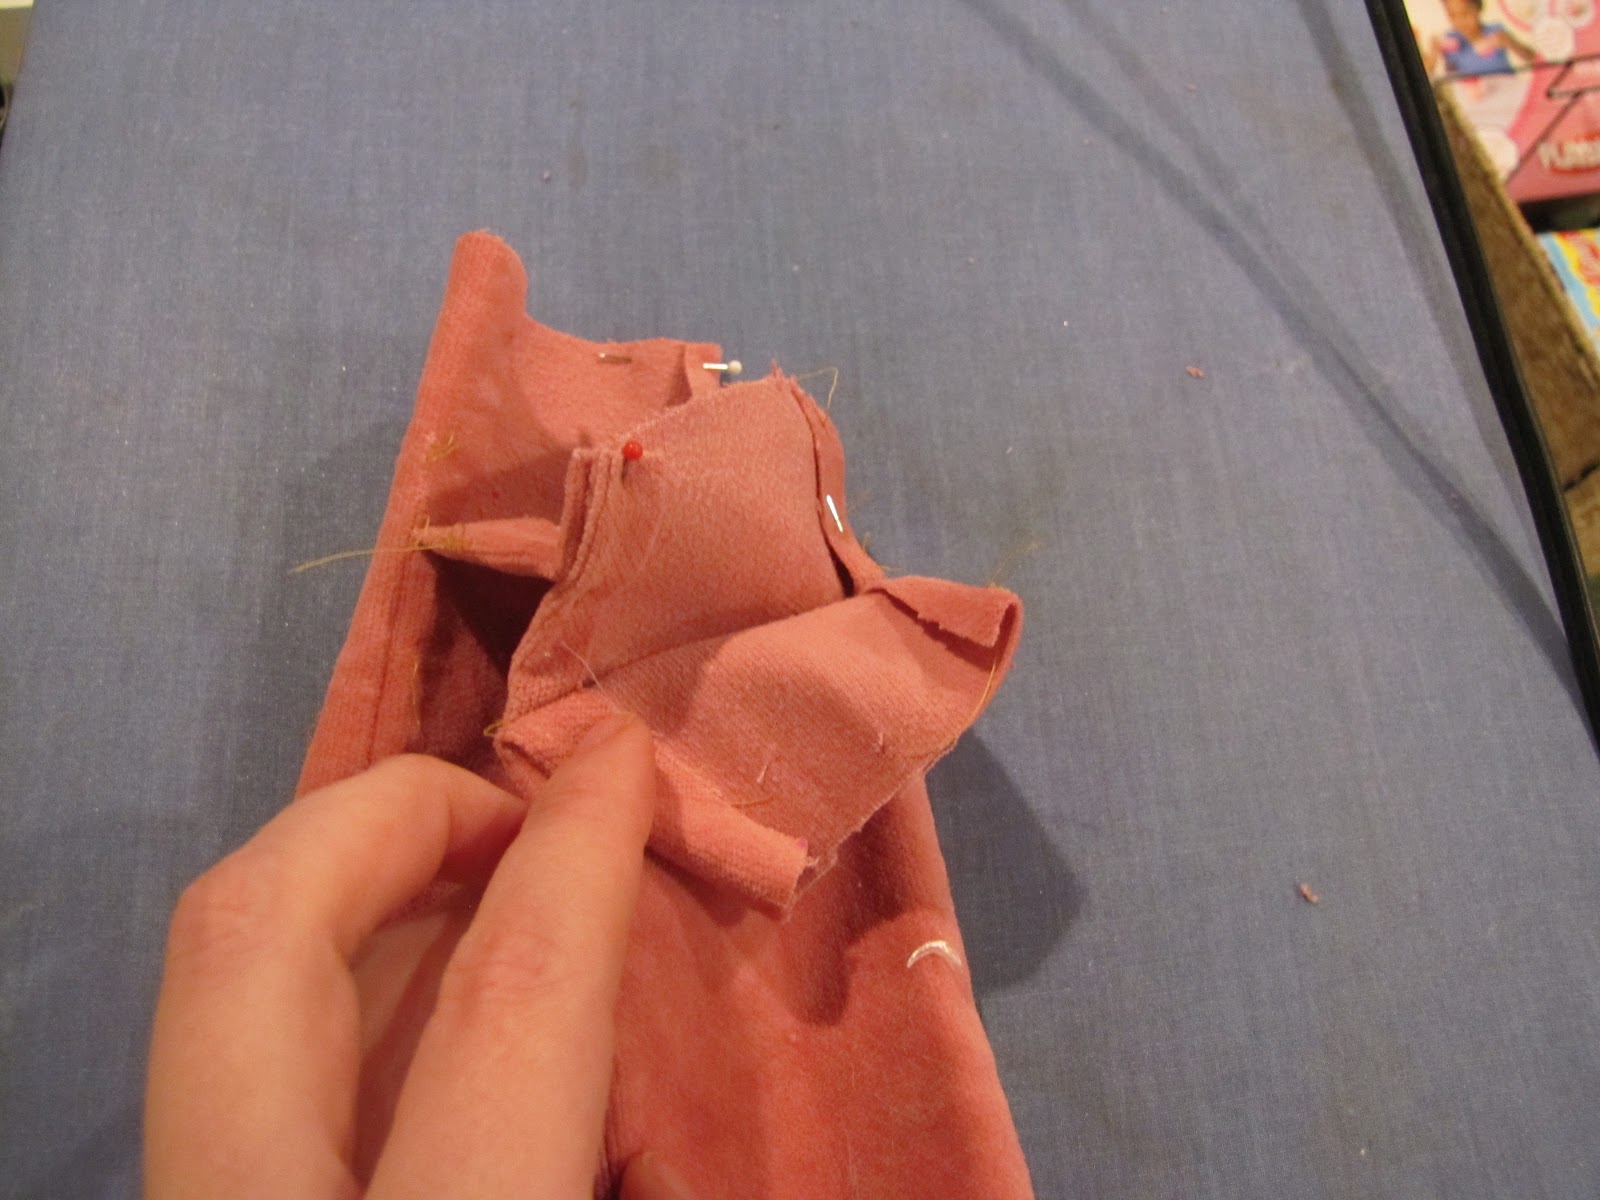
 I then sewed the ends of each tube together. Matching right sides together.

It's fairly awkward to pin together and sew, but ends up with the best result.

Then you have a finished seam across the scarf. All you have left is to pin up the sides and hand stitch them.

Good Luck!!

Forever and Ever Scarf


This is my beautiful mother sporting the new Infinity scarf I made her for Christmas.

She always forgets what they are called so she calls it her "forever and ever scarf."
This photo also includes the doll quilt I made for my niece in the background.

I used this tutorial. The fabric I used was stardard cotton fabric found at JoAnns. I made mine slightly narrower than the tutorial so I could make two scarves out of one piece of fabric. I simply cut the fabric in half width wise to make my two matching scarves. I gave one to each of my Moms. (my mom and mother-in-law)


My mom is a teacher so she loves light weight colorful/ statement making accessories to jazz up practical work attire. She is anxious to make another for herself!

Wednesday, December 14, 2011

Carrie's Christmas Creation!


My oh so very talented sister-in-law is joining us today as a guest blogger! I hope you enjoy her great tutorial for making Advent Calendar Christmas Trees:

I love Christmas, and am lucky enough to have a husband who is fully on board with my Christmas crafting addiction. This year, I really wanted to make an advent calendar. I love the sense of anticipation that comes along with an advent calendar but have been totally bored with the cheap paper or chocolate options available in stores. During an extensive Google and Pinterest search, I came upon some adorable options. (Here's a great roundup of ideas) My hesitation with most of the options I found was that they were aimed at families or took a far greater investment of time and money than I was up for. I knew I wanted to make some paper crafts, so I decided to re-purpose one as an advent calendar.

During my search, I stumbled across these adorable scrapbooking paper Christmas trees. I decided to make two of them and add pins to the bigger one from which to hang ornaments. This would be my grown-up friendly advent calendar.

First, I found some great holiday scrapbooking paper, double-sided is ideal. I bought this great pad of Martha Stewart Crafts paper. I also picked up some additional open stock pieces of green paper. I used this great tutorial, with a few minor modifications.
 Since I don't have a punch of any shape, I used a scrapbooking cutter to cut ovals about 1.5" long. I was also cutting out circles at the same time to make garlands, so I used an always handy cupcake tin to separate the colors and shapes. (I don't know if I would have made it through the cutting with out my husband's help!)


For my large tree, I used only shades of green but for my small tree I went for more variety. Once I had approximately a ton of ovals cut out, I wrapped the bottom and the top of my paper mache tree forms in dark green cardstock. Then, using a Sharpie marker, I curled the ovals about 1/2 way up. On the flat part, I put a dot of glue and then pressed the curls onto the tree form in a random order and in overlapping rows. I just used scrapbooking glue because I don't have a glue gun and it worked fine. When I got to the top of the trees, I cut a few more ovals in a smaller size to fill in the gaps.


At this point, my small tree was complete! Into my large tree, I stuck 24 white round head pins (pulled from my sewing kit). This was remarkably easy to do. I placed them so there would be enough space for the ornaments to hang. The final step was to make tiny ornaments for the advent calendar. Again, I cut little ovals using scrapbooking paper and wrote the numbers in black and silver Sharpie.


 I used tiny silver and brass jingle bells and snowflake buttons for the ornaments.
 Using a tapestry needle and thin ribbon, I strung each ornament with a date tag and placed them in a little bowl by the tree.


Each day, my husband and I enjoy finding today's ornament and slowly decorating our little paper Christmas tree.


Thanks to Becky for letting me write this guest post! I write a cooking blog, and couldn't figure out how paper trees would fit with the theme! I hope you are all having a great time getting in the mindset for the season. Do you have any favorite Christmas crafts that you return to year after year? Ones that it just wouldn't be the holidays without?

Happy Holidays!
                                                          ~CM
If there are any more talented crafters, aesthetic bakers, hand stitchers, crocheters, knitters, masters of the sewing machine, or creative people of any capacity or variety who would like to have a guest post, please feel free to send me a tutorial or post along with pictures of your work! I would be happy to consider you as a possible future guest post!

Monday, October 24, 2011

Pumpkins with our Pumpkin

The Fall is my favorite season, hands down. We even got married in the fall and had our son in the fall, so it keeps getting better and better! One of my favorite things is carving pumpkins. Since Lucas is a little young for that, this year we thought painting pumpkins was an ideal choice. 
So we set our little man up with some taped up pumpkins and some paint and let him go wild. 


He had so much fun that he started crying when we put the paints away!! We had to get them back out and give him another pumpkin to paint!


He even gave himself a round of applause when he finished!

Did you make any awesome pumpkins this year or start any new family traditions?
Related Posts with Thumbnails